|
|
|||
| site search by freefind |
Last edited December 15, 2021
(one 'how-to' on removing the 15" version's keyboard, there are many other pages...)
1) "No Bootable Device" error on Macbook Pro:
I too spent a lot of time trying to troubleshoot a MBP that was always coming up with the 'No bootable device...' screen including using external keyboards and trying all the key combinations from Apple clearing NVRAM, etc. Subsequently I found out that the original complaint was a sticky key - the "C" key in particular! So the stuck "C" key from the built-in keyboard was always sending to the computer, and this stopped any other key combination (internal or external keyboard) from having the expected results.
Here is a page on fixing bad keys! (This page is not for the A1266 15 inch MacBook Pro that I have, the keyboard film appears to be permanently sealed.) I temporarily 'fixed' this by removing the keyboard and lifting the tiny long flap on the ribbon cable that went to the keyboard, this left the touchpad alive and now I can work the machine using an external keyboard. Pictures coming...
Got a note from a reader:
I've had the same problem for a long time. Today I let my computer sit there until the login went away (black screen). Then I did a Command > Option > Eject and the login screen came back and my keyboard worked. Not sure if it was luck or not since it's the first time I tried it. Try it though and see if it works for you.
2) Built-in keyboard started to act up:
"Macbook Pro Trackpad and Keyboard no working?"
I was annoyed with the 2007 MacBook Pro 15" A1226 machine that I own as the keyboard (and touchpad) would both simultaneously cut out (stop working, dies, died, etc.)
and come back over and over and then finally die - until I rebooted or powered off and left it for a while. I tried many things to fix it - went searching around the 'net and found suggestions to put a bit of pressure on the connector here and there - that didn't work for me...
So I then went seriously searching for answers. Found Growler - a nice program that lets you know when hardware is connected or disconnected to your machine including IP addresses, external drives, and anything else and it happily showed that the keyboard was indeed disconnecting and reconnecting seemingly at random. Some days it worked fine, others it would only last a short time. Note that Growler only registers CHANGES, so if you keyboard is dead it won't show up. Growler helped me in that my keyboard would come and go, so I could eventually identify the cable as the problem.
During all this I could use an external USB keyboard and mouse, and I could also use another neat little program called iTap - this allows you to use your iPhone as a keyboard and touchpad for MACs and other PCs (Linux, Android, etc.). Handy when the keyboard would die and I didn't have a USB keyboard around! I can imagine other uses too...
I tried another keyboard from a friends computer that I was troubleshooting and low & behold it too was exhibiting the same symptoms on my machine! Now I was pretty sure the problem was in the MacBook Pro hardware or software. Built up a spare drive to check if it was software - loaded with 10.6...seemed to work OK...hmmm...have I picked up a software bug or (shudder) a MAC virus/trojan? Nothing listed anywhere indicated that this was around, but - well, the keyboard seemed to work with the second hard drive. OK, lets try my hard drive in my friends machine! That works fine - for a while, but wait, his keyboard is also again starting to cut out after a day or so...GAH! What is going on?
Well, I could bore you with various other tests I did, moving hard drives and keyboards back and forth until I slowly realized that perhaps BOTH keyboards had the same/similar problems with the USB buss and I needed to take a closer look there.
So tonight (Sat. April 16 2011 - about two weeks after this saga first started) I took one keyboard to the bench and with my handy ohm-meter I tracked down the four pins for the keyboard USB from the small PCB under the pad to the plug that connects to the A1226 motherboard. Ah-Ha! on one keyboard USB1 (DATA -/+) was not connected to the second pin of the plug, and on the second keyboard there was a 23 ohm resistance between USB2 (DATA +/-) and the plug! Wonderful! I can fix this sort of thing with tiny soldering work!!!
See pictures below for details of how I fixed each keyboard using wire-wrap wire, a very fine solid wire - quite flexible - with an easily stipped off insulation.
I hope this helps someone else!
John :-#)#
Note: I used a Weller mag-control soldering station WTCTP using a #7 fine tip for this repair - although any temperature controlled station will work. In other words do not use a very hot iron, just enough heat to melt the solder - I would turn the iron off while doing the actual soldering to reduce the risk of overheating the nearby flat ribbon connections at the flat plug (that connects to motherboard).
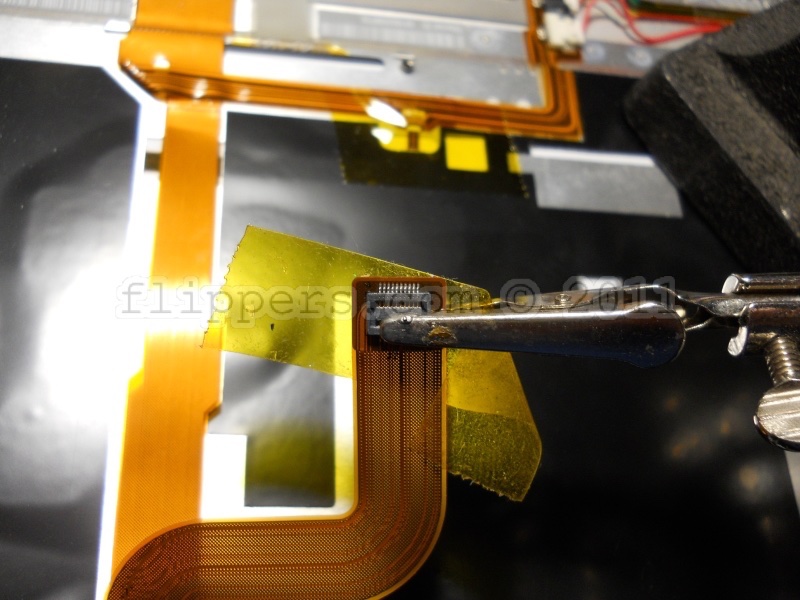 |
This is where I suspected the problem lies, the keyboard connector plug. Bad connections to the flat ribbon cable...or it could be the small connector on the PCB if the traces on the flat ribbon are worn...I didn't check there as I had reseated that connector several times and assumed it was fine...(maybe). | 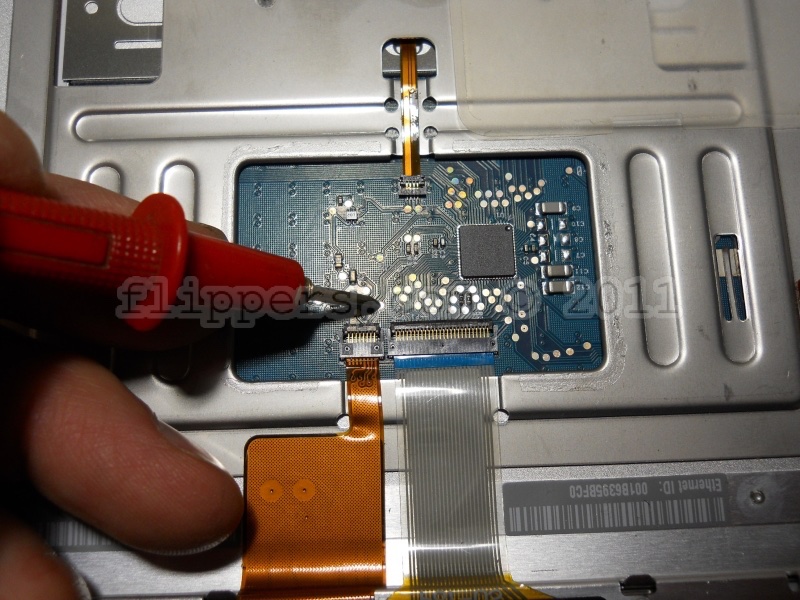 |
This solder dot is what I am calling USB1 for these repairs. DATA(-/+) would be more accurate, but in the interest of explaining simply I've taken liberties with the correct nomenclature. |
 |
The second pin here is where what I call USB1 is connected to the plug to the motherboard...this should have continuity using an ohm-meter - zero ohms (or under 2 ohms at most) |  |
So, lets solder one wire to solder pad USB1 on the PCB...put a small amount of solder on the tiny pad is probably best for a good joint. |
 |
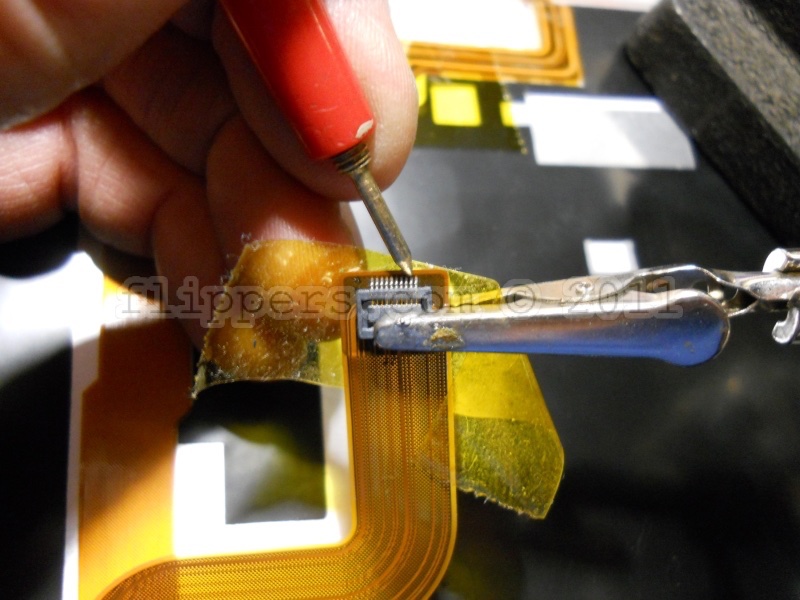
And the other end to pin 2 of the plug (USB1) - note - do NOT attempt to solder directly to the socket lead, rather 'tin' the wire lead and then heat it against the pin - this will melt the existing solder on the pad and give a good joint (tug test) | 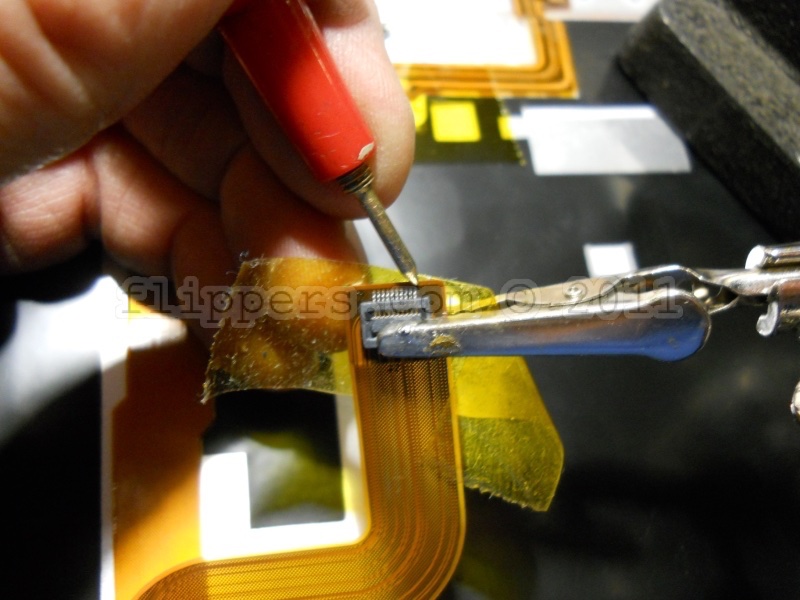 |
Oh, pin 1 is a ground pin - in case you were wondering. There are several pins that are also ground, but this is one of them... |
 |
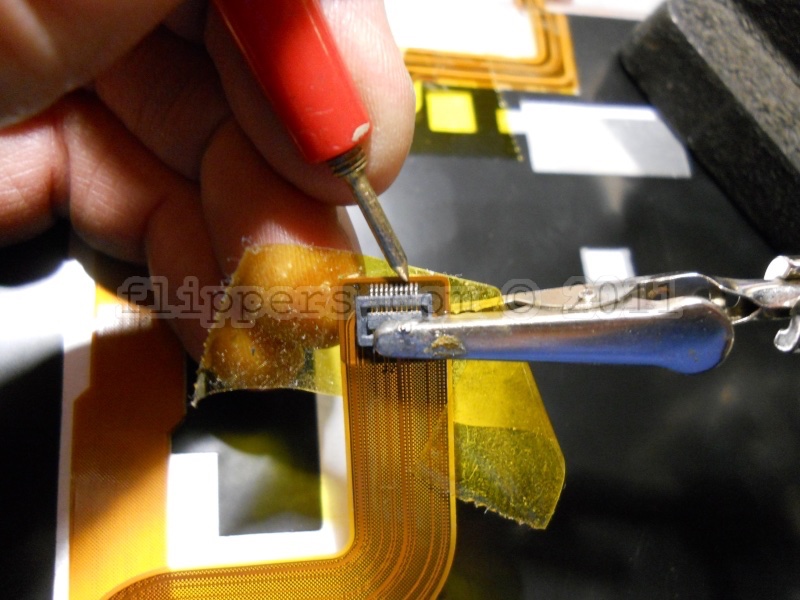
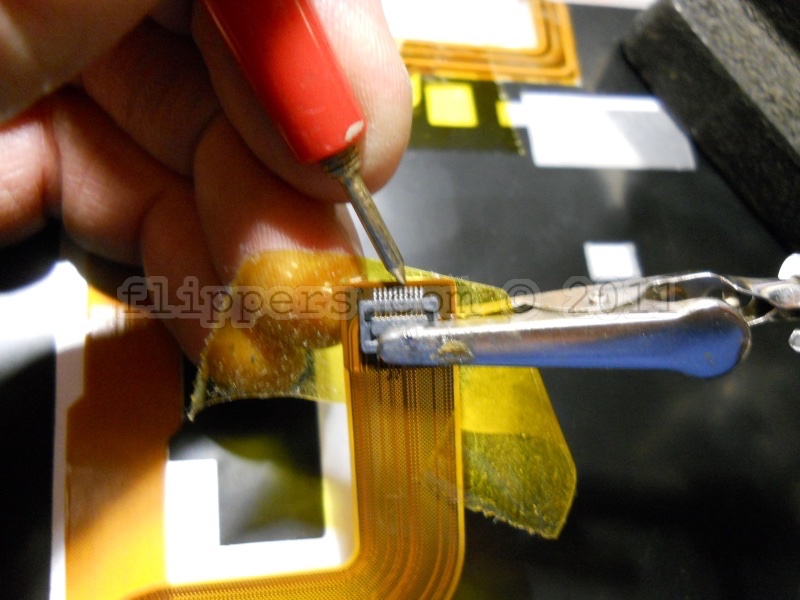
OK, here is the solder pad I'm calling USB2 (DATA +/-) | 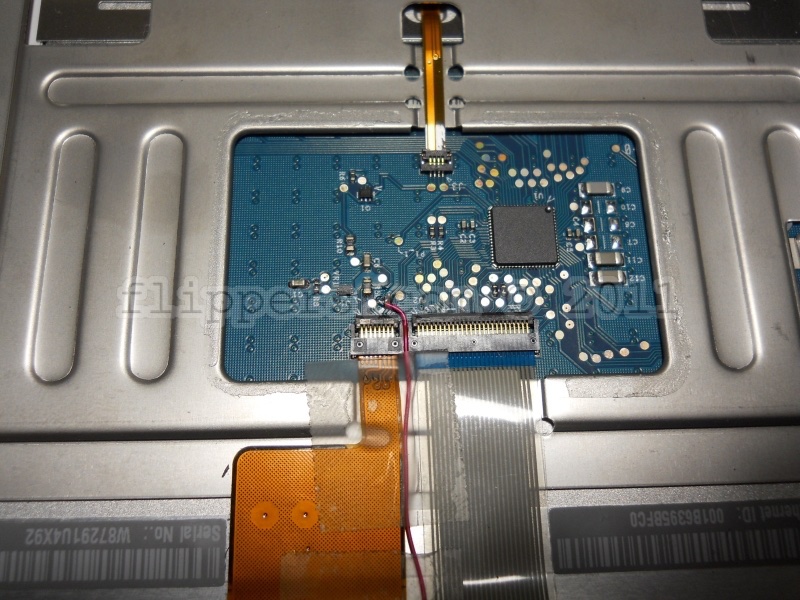 |
Lets solder a wire there for the second keyboard with the USB2 resistance problem...you can put a tiny bit of solder on the pad first. |
 |
Here is the pin for USB2, again there should be continuity here if measured with an ohm-meter. | 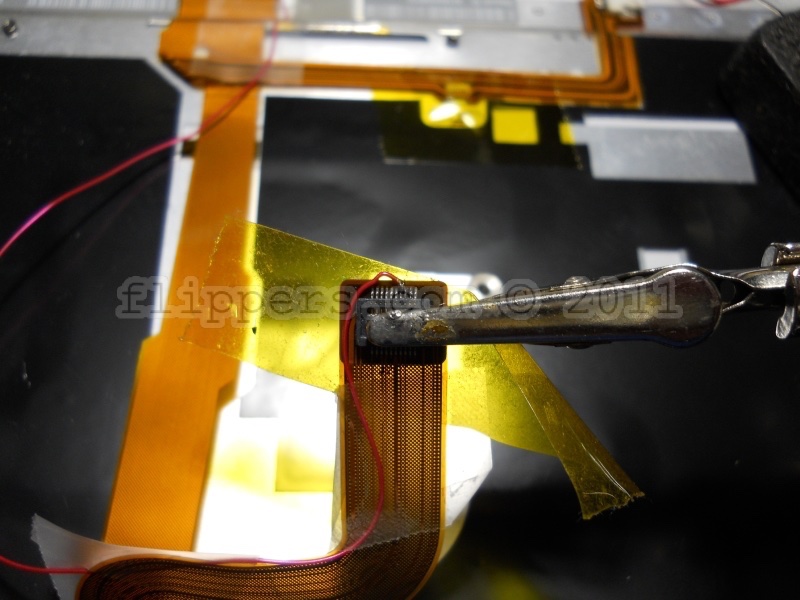 |
So solder the other end of the fine wire to pin 3 of the plug (USB2) - again tinning the wire, not the solder pad. |
 |
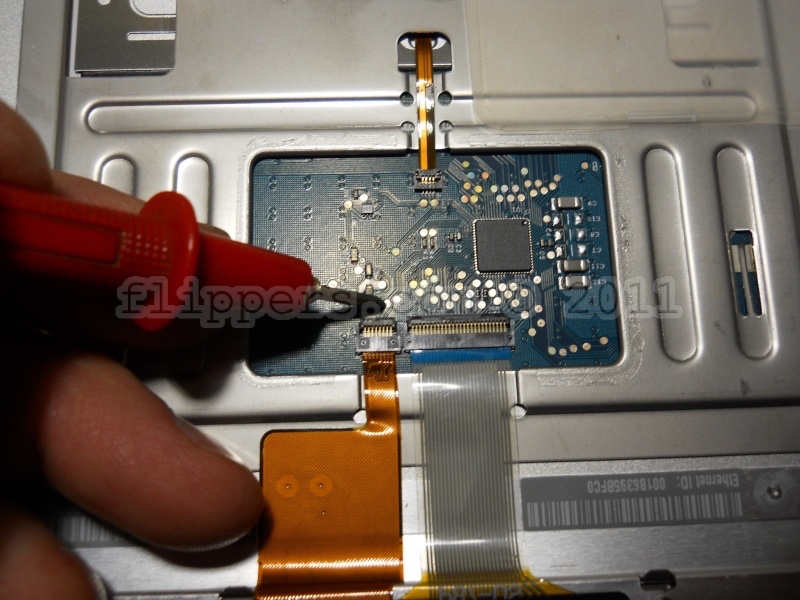
Oh, the 5VDC power to the USB PCB under the touchpad? It is the fifth pin, just to the left of fourth pin that I am pointing to (I thought the picture had me pointing to the fifth pin, but they are tiny!) Use an ohm-meter to check for shorts to either ground (metal backside of keyboard cover) or +5 - it is easy to have a tiny solder jumper, trust me!) | 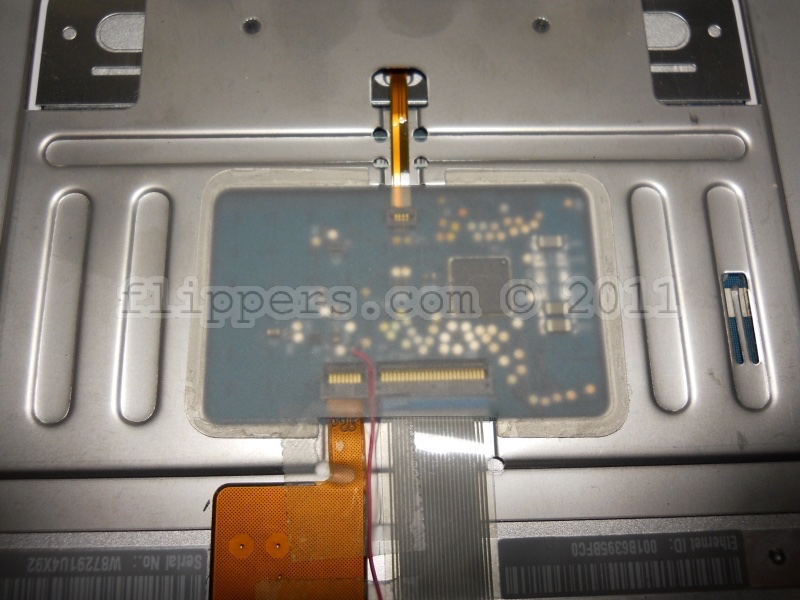 |
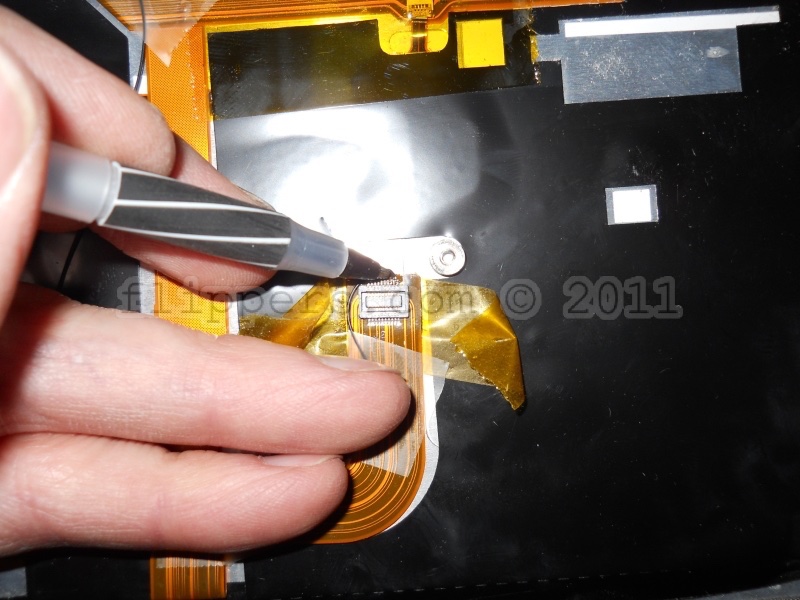
There - doesn't that look fine? The best solution would be to replace the flat ribbon cable - if someone has a part number they can send me I'll add it to this page! |
(jrr-at-flippers-dot-com for those who do not have their browser set to open their email client) |
 Click here to order Parts