|
 Click here to order Parts
|
|||
| site search by freefind |
(If you don't see the Google Translate's "Select Language", then your browser is blocking google translate...so enable googleapis.com)
Updated: December 15, 2021
ROCK-OLA troubleshooting:
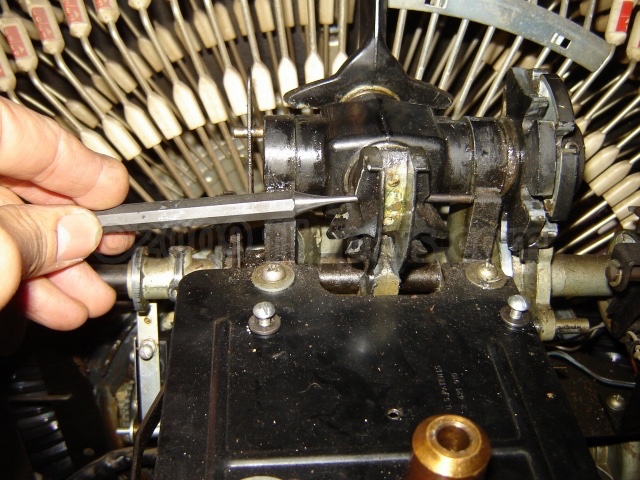
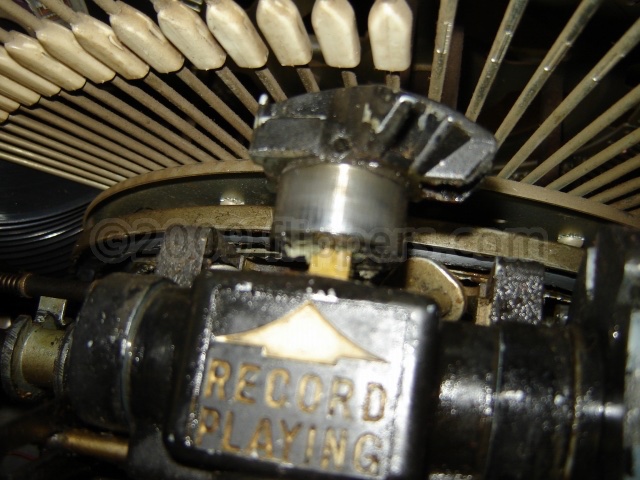
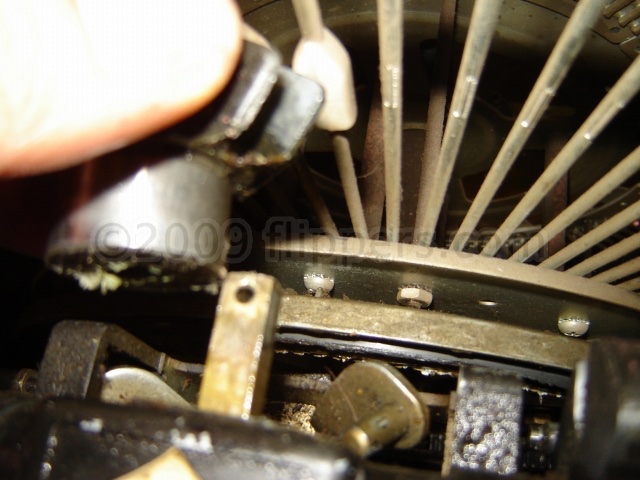
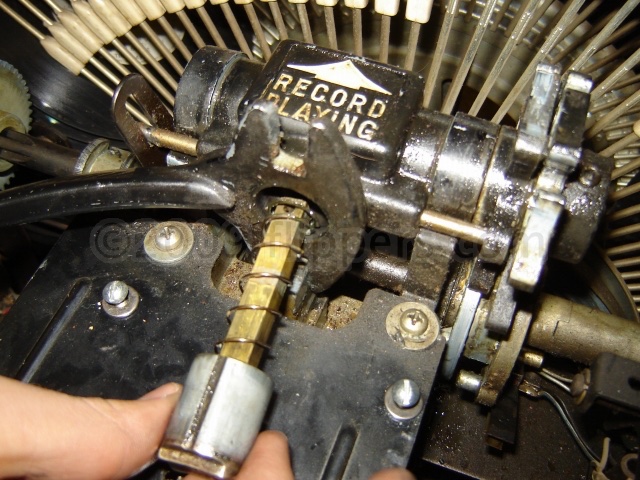
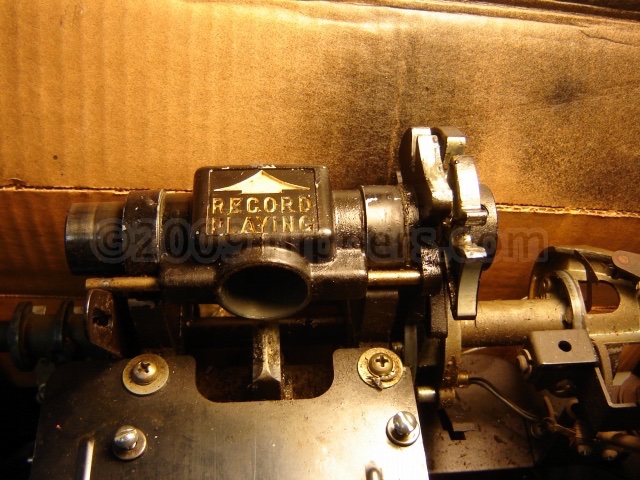
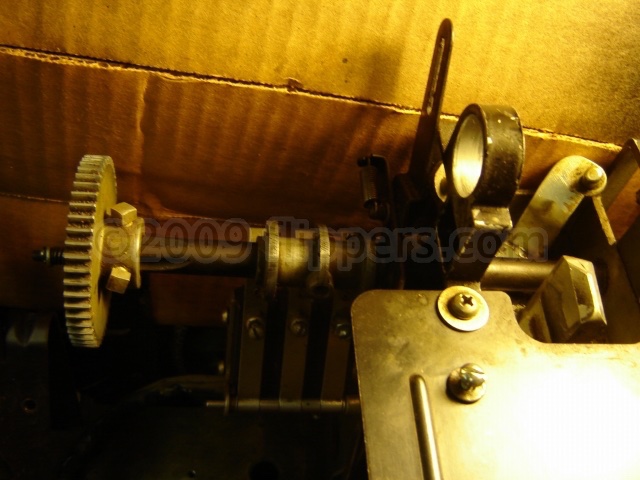
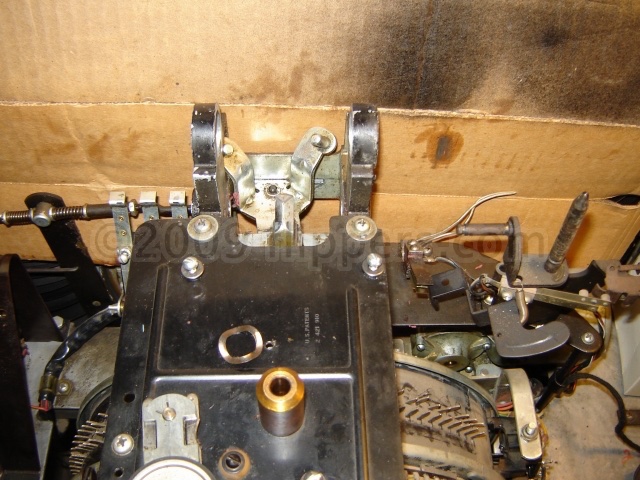
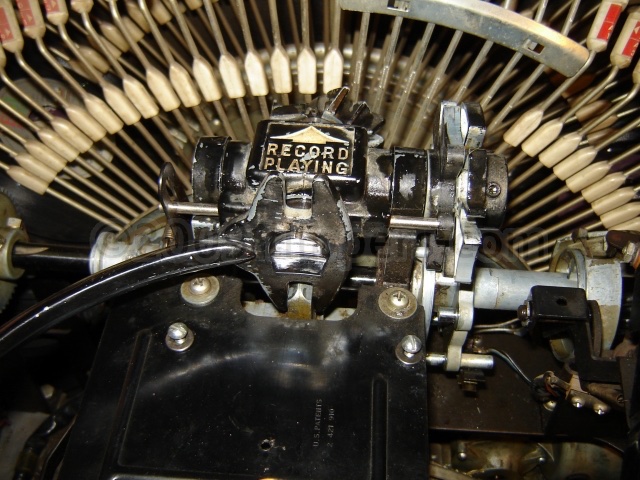
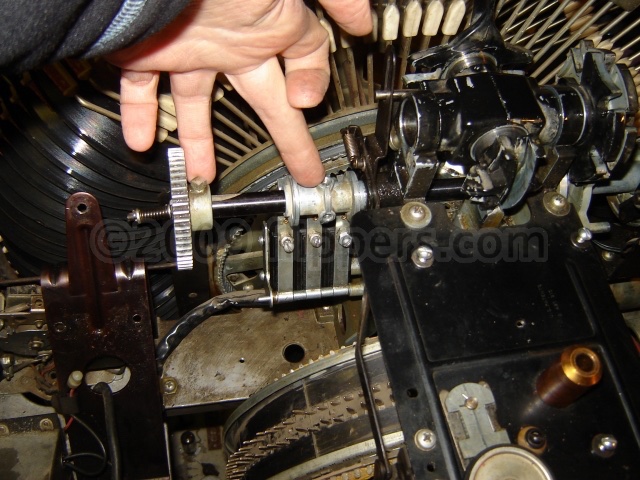
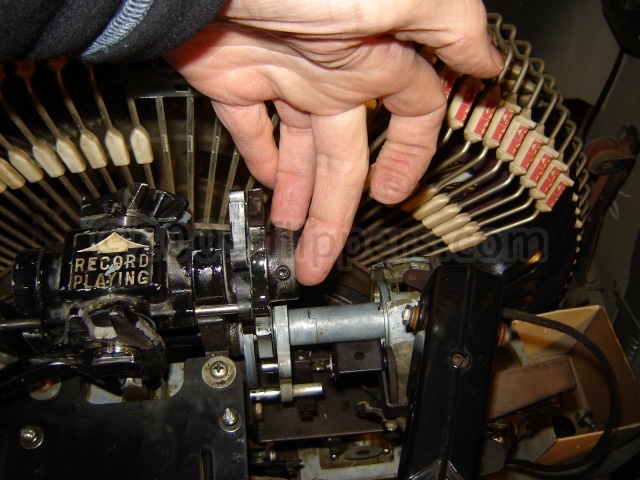
GRIPPER REBUILDING:
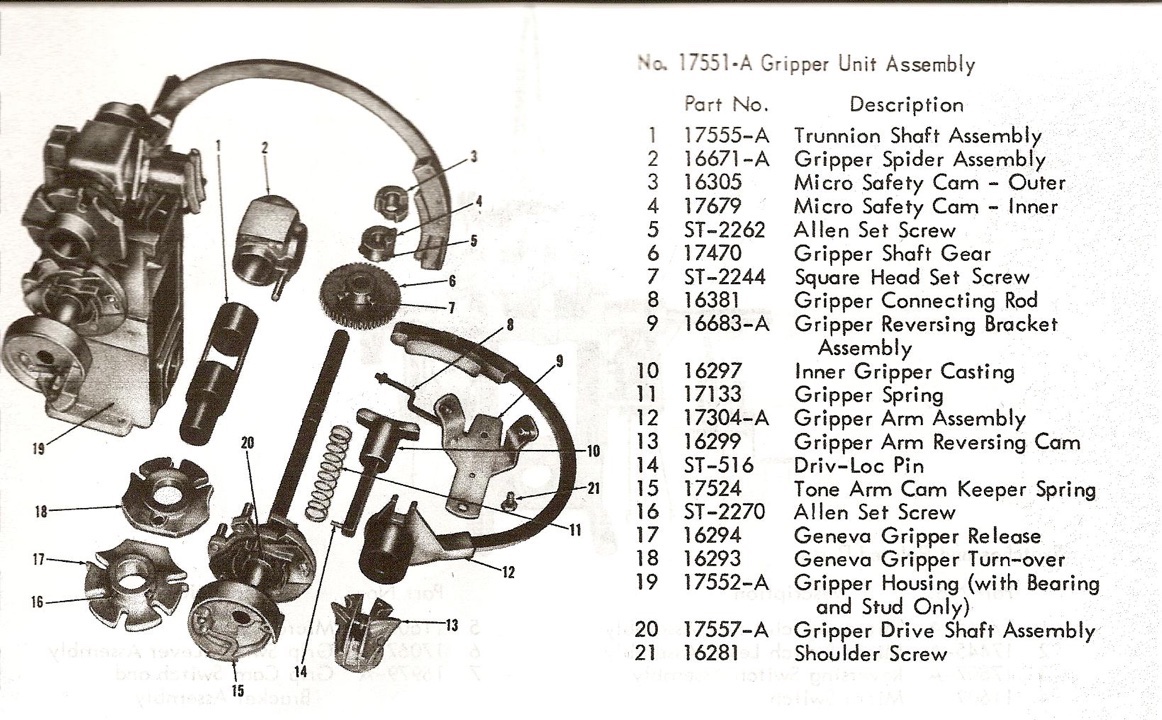
It is best to take this completely apart. I find when it is seized that if you warm it with a hair dryer or heat gun for a while - until it is hot to the touch (not burning) - that this will loosen up the dried grease enough to disassemble.
You want to remove pin #14 (Driv-Loc) so #13(Gripper Arm Reversing Cam) can be removed from the shaft of #10 (Inner Gripper Casting). Watch that the internal spring #11 (Gripper Spring) doesn't take off!
Now you can pull off #12 (Gripper Arm Assembly - Gripper Bow), pull the other cams off, then extract #1 (Trunnion Shaft).
Wash everything with Varsol (solvent), then oil and reassemble.
Anything else just won't last more than a year or two before gumming up again.
These pictures give you an idea on the process - click on any one for a larger image.
 |
 |
 |
 |
 |
 |
 |
 |
 |
 |
 |
ROCKOLA Grand Prix II (model 426):
Not selecting one side or misses selections and scans forever (skipping over selected pins)?
If this happens there is a quick test to try - with the machine powered up but Run-Stop-Scan is flipped to stop over a pin, connect a jumper wire to the select wire on the side that is not tripping (and the machine is on that side's scan!!), now pull the R-S-S lever to Run (be prepared to push back to stop) and the machine should IMMEDIATELY pick up the record.
If it does pick up a record then the problem is the contact that the wire blade makes with the side 1/2 pin (touches the selected pin) is too dirty for good operation. You will need to take the search arm off the jukebox (simply remove the bolt on the shaft and rock it off the keyed shaft) and then remove the tiny Phillips screws holding the blade of the readout pins, and polish the faces with something mildly abrasive - I like using an Ink eraser, one of those pink/blue pencil ink eraser pairs. Then simply put the housing back on the keyed shaft and if you haven't tweaked the adjusting screw on the side it should still be as well aligned as when you started.
No pictures of this process, hope the words are enough...
John :-#)#
December, 2019
ROCKOLA Harley HCD-4 Jukebox.
Amplifier 56180-1A
Noise over speakers, also present when machine is idle and the BGM switch is ON. If the volume control has no effect on the noise (raspy sort of sound) then try this first - Replace four of the 1mFd/16V Tantalum radial capacitors C6 & C7, and C12 & C13. Replace them all even if the noise is only coming out one speaker channel.
(jrr-at-flippers-dot-com for those who do not have their browser set to open their email client) |